Difference between revisions of "Stone Rose Install"
| (23 intermediate revisions by 3 users not shown) | |||
| Line 1: | Line 1: | ||
''' | '''Version 3.0''' <br> | ||
Parts Included:<br> | |||
Included:<br> | |||
Stone Rose Stem<br> | Stone Rose Stem<br> | ||
2 Rose head assemblies<br> | 2 Rose head assemblies<br> | ||
| Line 17: | Line 12: | ||
Sconces must be attached to flush wall mounted J-boxes. 120V. Dimmer compatible. | Sconces must be attached to flush wall mounted J-boxes. 120V. Dimmer compatible. | ||
{| class="wikitable" | {| class="wikitable" | ||
|+Install | |+Install | ||
! Images | |||
! Description | ! Description | ||
! Notes | ! Notes | ||
|- | |- | ||
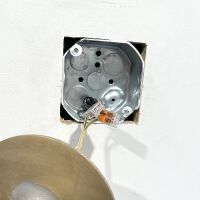
| 1. | ! scope=row | [[File:Image.JPG|200px]] | ||
| 1. Turn off power to J-Box. || | |||
|- | |||
! scope=row | [[File:Wagoconnectors.jpg|200px]] | |||
| 2. Use WAGO connectors to connect sconce wires to wall wires. | |||
|Polarity does not matter.|| | |||
|- | |- | ||
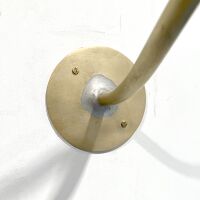
| | ! scope=row | [[File:Brassscrews2.jpg|200px]] | ||
| | | 3. Use 8-32 brass flat head screws to attach sconce to J-box. | ||
|Black washers are intended to be removed.|| | |||
|- | |- | ||
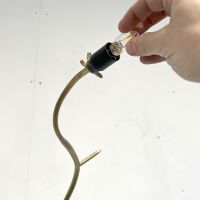
| | ! scope=row | [[File:Screw bulb.jpg|200px]] | ||
| | | 4. Install light bulbs in sockets.|| | ||
|- | |- | ||
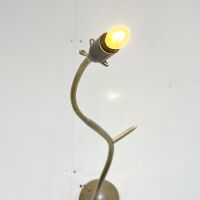
| | ! scope=row | [[File:Power on.jpg|200px]] | ||
| 5. Power can be restored and sconce tested.|| | |||
|- | |- | ||
| | ! scope=row | [[File:Thumbscrews.jpg|200px]] | ||
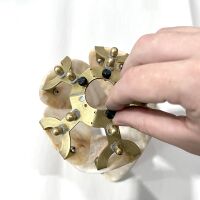
| 6. Unpack rose heads carefully and remove the 3 black thumb screws. | |||
|Rose heads are extremely fragile.|| | |||
|- | |- | ||
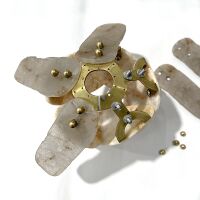
| | ! scope=row | [[File:Bottom petals.jpg|200px]] | ||
| 7. Attach the 5 bottom row petals on each rose head with brass acorn nuts.|| | |||
|- | |- | ||
| | ! scope=row | [[File:Rosehead.jpg|200px]] | ||
| | | 8. Slide the rose over the bulb and socket and secure to stem with 3 black thumb screws.|| | ||
|- | |- | ||
| | ! scope=row | [[File:Image.JPG|200px]] | ||
| 9. Repeat with second rose head.|| | |||
|- | |- | ||
| | ! scope=row | [[File:Image.JPG|200px]] | ||
| 10. Remove leaf petal from packaging.|| | |||
|- | |||
! scope=row | [[File:Image.JPG|200px]] | |||
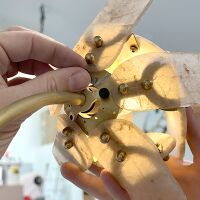
| 11. Attach leaf petal using felt washers and brass acorn nuts.|| | |||
|} | |} | ||
<br> | |||
The brass and silver stem is uncoated and will patina over time. If desired patina can be removed with T-9 Boshield and maroon Scotchbrite pads. Rose petals are made of quartz, a hard, nonabsorbent stone that can be cared for like glass. Each slice is unique and cannot be replaced. | |||
<br> | |||
<br> | |||
The Stone Rose Table Light is an art piece and comes with no warantees. However we will replace electrical components due to manufacturing defect and normal operational wear for 1 year (not included: impact damage, water damage, electrical surge damage). After 1 year, cost of repair will be evaluated. Shipping costs are not covered. Email [email protected] to make repair arrangements. | |||
Latest revision as of 00:45, 9 April 2024
Version 3.0
Parts Included:
Stone Rose Stem
2 Rose head assemblies
1 Leaf petal
3 Candelabra base 15W T22 E12 bulbs
Felt washers
3 M4 brass acorn nuts
7 Black thumb screws
2 8-32 brass flat head screws with temporary washers
Sconces must be attached to flush wall mounted J-boxes. 120V. Dimmer compatible.
The brass and silver stem is uncoated and will patina over time. If desired patina can be removed with T-9 Boshield and maroon Scotchbrite pads. Rose petals are made of quartz, a hard, nonabsorbent stone that can be cared for like glass. Each slice is unique and cannot be replaced.
The Stone Rose Table Light is an art piece and comes with no warantees. However we will replace electrical components due to manufacturing defect and normal operational wear for 1 year (not included: impact damage, water damage, electrical surge damage). After 1 year, cost of repair will be evaluated. Shipping costs are not covered. Email [email protected] to make repair arrangements.

